Connecting the TV antenna is a longtime investment as it causes huge expenditure. So, obviously, you’ll want to get a powerful antenna for your television where there’ll be zero disturbances.
But what to do and how to make the most powerful antenna in the world?
Obviously, you want to make your TV antenna as powerful as everyone wants! Nobody likes to face disturbance while enjoying a program, right?
That’s why you’re here; believe us, we’ll give you the best solution to make your TV antenna powerful and support a strong signal.
Let’s not exaggerate our words. Jump to the article to get the solutions for making the most powerful antenna in the world.
How to Make the Most Powerful Antenna in The World? Step-by-step guide:
So, this step-by-step guide to help you how to make the most powerful antenna in the world?
Preparing a homemade antenna is relatively straightforward and needs only a few accessories. It’ll be more manageable if you’ve previous repair and service experience.
However, you can make the most powerful antenna in the world by accomplishing some simple steps, although you’re a novice. Let’s see what they are!
Requirement Accessories and Tools
Here are the accessories and tools you’ll need to prepare a powerful TV antenna.
- A large cardboard
- Sharp scissors and box cutters
- Aluminum foil
- Strong glue (Wood Glue is preferable for a stronger connection)
- Drilling machine
- Two Screws with nuts
- Washers
- Matching transformer
- Coaxial cable
- Decorating items, like decorating paper, paint, markers, etc. (Optional)
Steps to Follow
Step 1: Cut the Cardboard and Make the Suitable Size
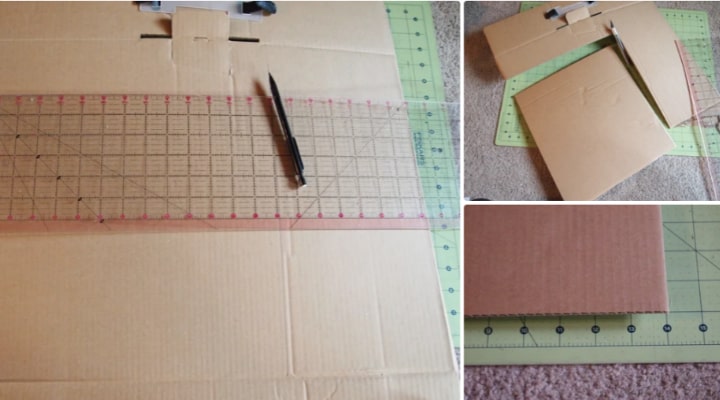
Take the cardboard and make it a 13” *14” pattern that’ll be the main part of your antenna. The measurement is suitable for making a powerful antenna, so you must maintain it.
Step 2: Attach the Cardboard with Aluminum Foil and Decorate it
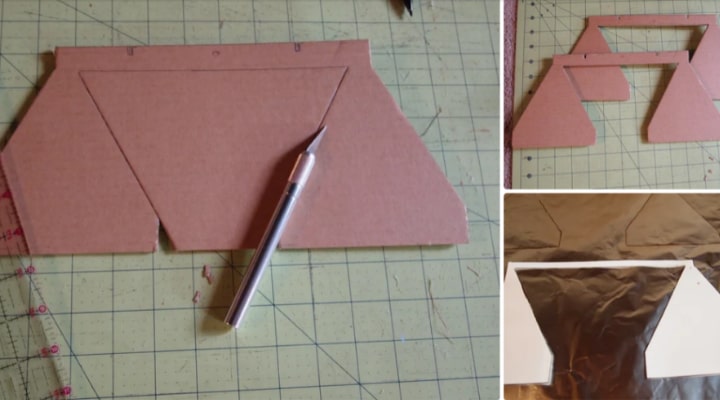
With strong glue, attach the aluminum foil to the cardboard piece. Smoothen the Wood connecting glue is preferable for the stronger connection between aluminum foil and cardboard.
Reverse the cardboard with aluminum foil, paint it and decorate it as you like. Use markers and construction paper to decorate the cardboard and dry it out.
Step 3: Make the Small Wings with The Cardboard
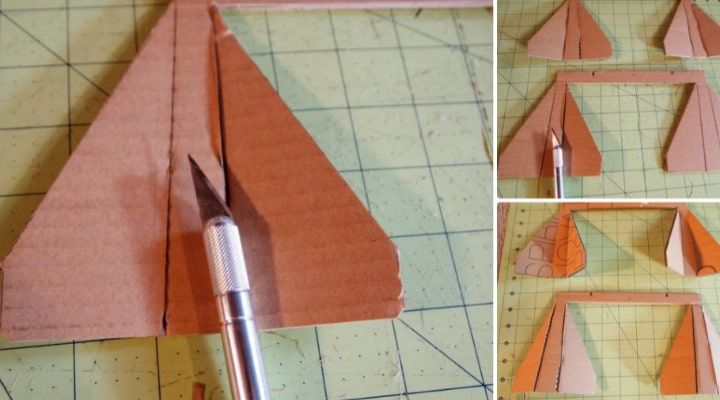
Make the pattern pieces with a longer piece and two wings. Now place the pattern on the cardboard and cut it according to your customized pattern. Besides this, you’ll also need to cut a mounting bracket. We’ll go through the process of making the mounting brackets at our 7th stage.
Step 4: Make Small Pieces of Aluminum Foil
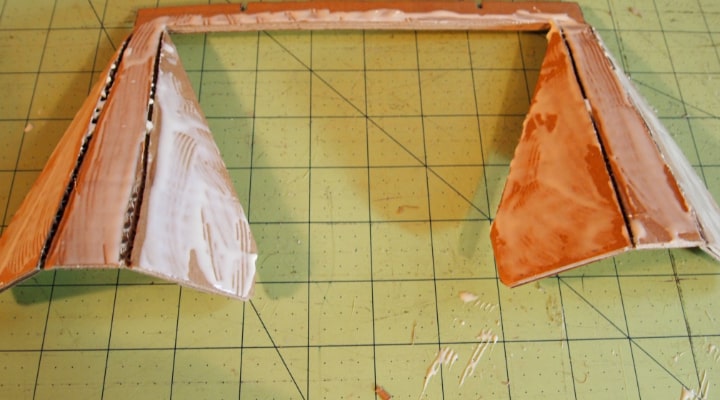
Now take the aluminum foil. With the scissor, cut the foil as you did into the cardboard. Make sure you use the scissors to cut the aluminum foil; otherwise, you might tear the paper.
So, you have two cardboard pieces, pieces of foil paper, and two mounting brackets that look exactly similar. Also, you’ve patterned pieces for use for different purposes.
Step 5: Make the Wings with The Cut-Pieces
Take the patterned cut pieces for shaping the wings that have dashed lines. Draw the dashed lines with a pencil and fold the pattern inwards.
Afterward, take your box cutter and cut the cardboard throughout the score marks. Here you’ve got the perfect shape for the wings. Now add the wood glue to the beginning of the dashed line areas to secure the wings.
Let’s come to the angle of the wings, which should be 90 degrees each with a little spreading. Apply some hot glue to the right place and let it dry to secure the expanded angle strongly.
Step 6: Stick the Wings with The Main Pieces
At this stage, wrap the wings of the cardboard with aluminum foil pieces. Use strong glue to attach the cardboard and aluminum pieces. Keep in mind that the foil won’t cover the middle of the cardboard wings. Instead, it’ll reach to the closest of the wings.
Still, put on the foil onto the cardboard and smoothen it out with the thin layer of glue. Here we recommend using the thin layer because it’ll stick to the foil and dry quickly.
Step 7: Paint the Mounting Pieces
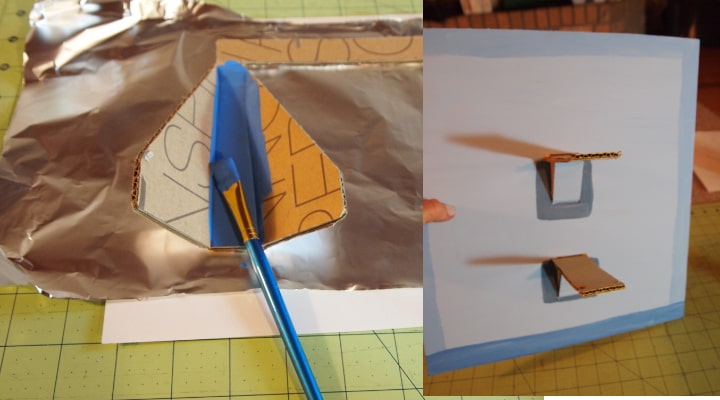
So, your final task is almost done; it’s time to decorate mounting brackets.
Now, take the main piece of cardboard, where you’ll attach the combined wings. Make sure the part is dry. Hold the cardboard vertically where the 13-inch side will go left to right, and the 14-inch will go top to bottom.
Place the patterned pieces onto the cardboard and carefully cut the board with your box cutter. Insert the mounting brackets into the slot of the main part. Turn the mounting brackets sideways to adjust into the rectangular hole of the cardboard.
If the mounting brackets fit tightly into the cardboard, you can make a small portion of your cardboard. Apply a little glue at the side to adjust the mounting brackets into the hole smoothly and firmly.
Step 8: Attach the Cardboard Piece with the Main Body
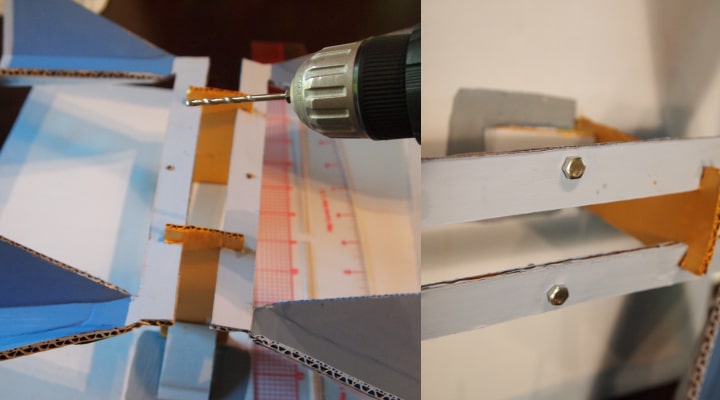
It’ll take some time to dry out after you attach the mounting bracket to the central part of the cardboard. Once the part dries out, that means the mounting brackets have firmly attached to the part.
Now, let’s proceed to the next step and attach the part with the main body of the cardboard.
Step 9: Start Wiring
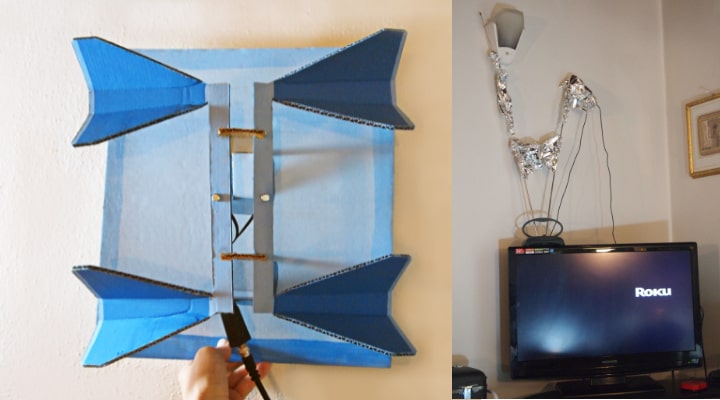
Take the wings you’ve made with aluminum foil and antenna pieces. Attach the wings with the cardboard adding only a few drops of glue.
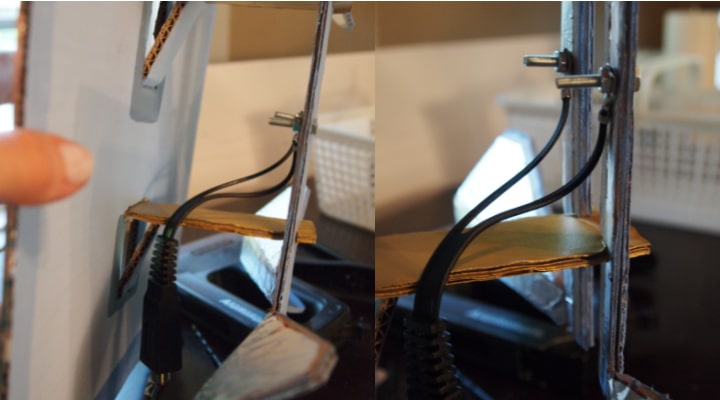
The last stage is quite simple. Mark the circle on the two main winged pieces of cardboard. Make two holes in the marked spots with a drilling machine and insert the screws.
Now, take your transformer with coaxial cable and twin lead at its two sides. The washer will go through the screws of the cardboard. Take a wire from the transformer through the screws and tighten all of them together using the bolts.
The same thing will happen with another lead, and the screws and bolts will be tightened like before.
Your antenna is ready to give the service. Pull the coaxial cable of your television and attach it to the empty end of the transformer. Plug in your television with the other side of the coaxial cable, and power it on.
Why Is My Antenna Signal Weak?
Any domestic interference can make the signal of your antenna poor. Domestic interferences include the high hills, buildings, trees, or any disturbance from your nearest neighbor.
Final Words!
If you apply the process here, you’re going to get a stronger antenna that can beat any powerful antenna of current times. So, how to make the most powerful antenna in the world? Our homemade antenna will surprise you if you still need help finding the way.
